Profile layout
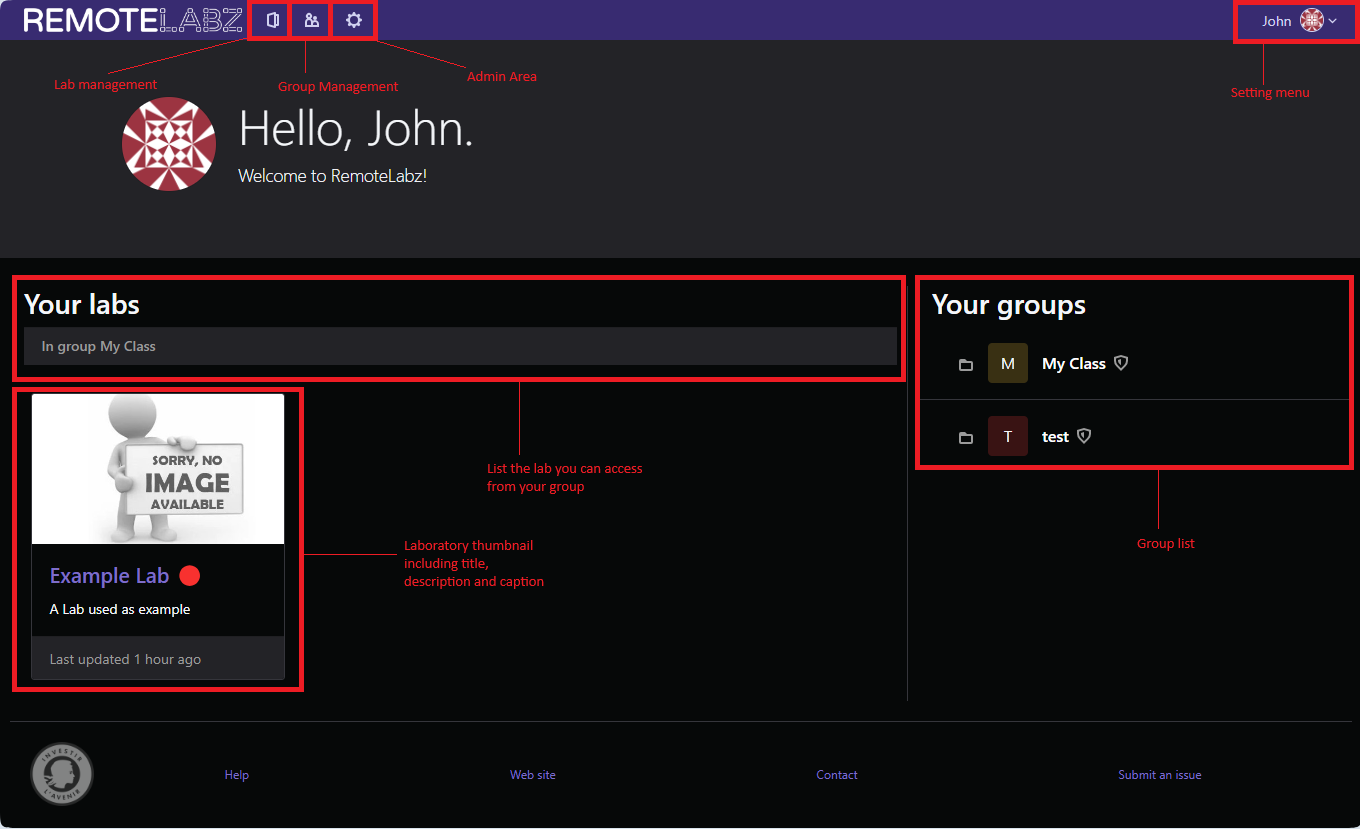
After login as a teacher, you will be taken to your profile main page.

The screen is divided in 6 main parts :
- The lab management tab (on which you can create or stop lab)
- The group management tab (on which you can create groups and add your student to them)
- The booking menu tab (on which you can book a physical lab)
- The admin area (which allow you manage almost every aspects of the application)
- Your lab list (those you can access from your groups)
- The setting Menu which allows you to customize your settings.
- The lab instances which allows you to start/stop or leave a lab
Admin area

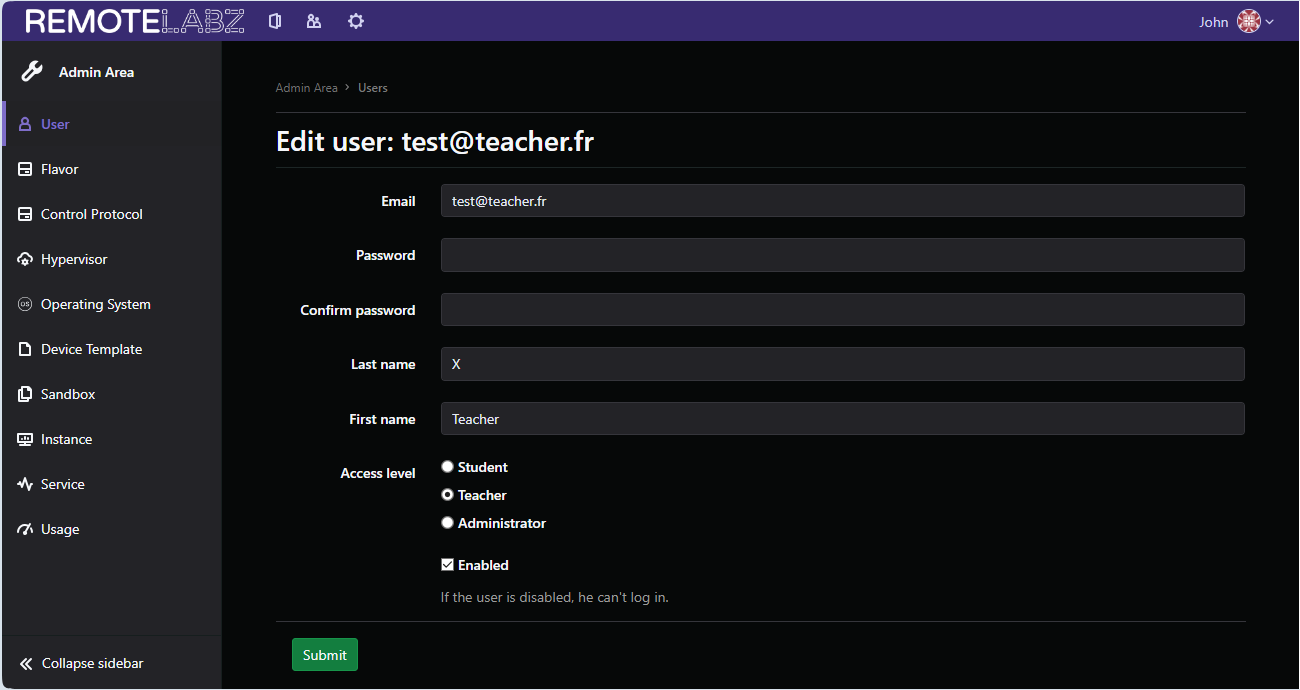
Inside this area, you can manage many elements such as :
- Users : They can be added/modified/Removed from this area
- Flavors: They can be added/edited or deleted there.This corresponds to the device's memory presets which define which amount of memory a device can consume.
- Control protocols :They can be added/edited or deleted from there.This corresponds to the protocol used to access the device.
- Operating system which corresponds to the list of operating systems available to create a container
- Device Templates : the configuration templates for every available device can be added/edited or deleted from there.
- Sandbox : The containers, vms can be started from there.New container can also be created from existing containers.
- Instances : allow the administrator to start/stop/leave every lab from there.
- Services : Allow the administrator to start/stop critical system services such as :
- Worker service which is the service that runs all the VM/Container for remotelabZ
- proxy service which is the service that control the private network used by the labs.
- Messaging service: which handles communications between the front and the worker.
- Usage: give the administrator an overview about which resources are consumed by the worker.
Profile restriction
The administrator can administrate all the application.