RemoteLabz's front update guide
Save your .env file
All configuration variables are saved in the file .env.local or if you don't have this file, in the file .env
If you don't have a .env.local, save your .env to .env.local
sudo -u remotelabz cp .env .env.local
Update the code
cd /opt/remotelabz
git fetch
git pull
Info
To choose a specific version :
git checkout tags/2.X.Y
git checkout dev
Compare your .env.local file with the .env file to make sure the same parameters are there
cd /opt/remotelabz
sudo bin/remotelabz-update.sh
Migration from 2.4.4 to 2.5.0
We recommand you to install from a clear ubuntu distribution installation this new version. Otherwise, you have to do a dist-upgrade to Ubuntu 24.04, install PHP 8.4 and NodeJS 20.
cd /opt/remotelabz-worker
git checkout Upgrade-2.5
git fetch
git pull
sudo apt install qemu-utils to support image vmdk and ova importation.
Next step, you have to configure your php to allow large file upload. In this example, we allow up to 10G for a file.
sudo nano /etc/php/8.4/apache2/php.ini
upload_max_filesize = 10G
post_max_size = 10G
max_execution_time = 300
max_input_time = 300
memory_limit = 128M
file_uploads = On
max_file_uploads = 1
Add iso directory : sudo mkdir /opt/remotelabz/public/uploads/iso
After these steps, you can make the previous general command to update your RemoteLabz solution.
Add SSH keys for front to worker
Check you have execute the part "SSH key between the front and the workers" from update "Migration from 2.4.3 to 2.4.4" part.
You can verify by executing the following command
sudo -u remotelabz ssh -i /home/remotelabz/.ssh/myremotelabzfront remotelabz-worker@Worker_X-IP
Add the reverse proxy
HAProxy on your front
sudo apt install haproxy
You have to create your .pem for the certificate.
sudo cat RemoteLabz-WebServer.crt RemoteLabz-WebServer.key > ~/RemoteLabz-WebServer.pem
sudo mv ~/RemoteLabz-WebServer.pem /etc/apache2/
Replace your /etc/haproxy/haproxy.cfg par le fichier disponible dans /opt/remotelabz/config/haproxy/.
sudo cp /opt/remotelabz/config/haproxy/haproxy.cfg /etc/haproxy/
sudo systemctl restart haproxy
Change the configuration of Apache2
Now, Apache2 listen on port 8080 and 8443
In your /etc/apache2/sites-enable/100-remotelabz-ssl.conf change the line <VirtualHost *:80> to <VirtualHost *:8080>. In your /etc/apache2/sites-enable/200-remotelabz-ssl.conf change the line <VirtualHost *:443> to <VirtualHost *:8443>
In your /etc/apache2/ports.conf, you must have the following configuration :
# File /etc/apache2/ports.conf
Listen 8080

<IfModule ssl_module>
        Listen 8443
</IfModule>

<IfModule mod_gnutls.c>
        Listen 8443
</IfModule>
config/apache/200-remotelabz-ssl.conf to your Apache directory /etc/apache2/sites-enabled/ and replace the IP parameter with the IP address of your frontend in the line ServerName 192.168.11.131.
Add the module headers and remoteip
a2enmod headers
a2enmod remoteip
Now, you can restart your apache2 service : sudo systemctl restart apache2
New asyncrhonous notification system
Add the file /opt/remotelabz/config/system/remotelabz-cron in your cron.d directory.
sudo cp /opt/remotelabz/config/system/remotelabz-cron /etc/cron.d/
Don't forget to update your worker configuration and share your remotelabz-worker key to the front. Read the RemoteLabz worker update documentation.
Migration from 2.4.3 to 2.4.4
The RabbitMQ configuration need to be modified in order to manage multiples workers.
sudo rabbitmqctl set_user_tags remotelabz-amqp administrator
sudo rabbitmq-plugins enable rabbitmq_management
sudo rabbitmqadmin delete exchange name=worker
Then, the following commands must be entered :
cd /opt/remotelabz;
sudo chmod 664 config/packages/messenger.yaml;
sudo chown www-data:www-data config/templates;
sudo chmod 664 config/templates;
sudo mkdir backups;
sudo chmod 644 backups;
sudo apt-get update;
sudo apt-get install tmux;
SSH key between the front and the workers
Warning
Prior to execute the following task, update all your workers. Their version must not be older than 2.4.3 or dev from october 26, 2024 (commit 5b929ae)
Check that you have a remotelabz user with a directory /home/remotelabz and /home/remotelabz/.ssh with the correct ownerships and permissions.
Generate the key named myremotelabzfront, defined in your .env.local with the following command:
sudo -u remotelabz ssh-keygen
sudo -u remotelabz ssh-keygen -m PEM -t rsa -f /home/remotelabz/.ssh/myremotelabzfront
sudo -u remotelabz ssh-copy-id -i /home/remotelabz/.ssh/myremotelabzfront.pub remotelabz-worker@Worker_X-IP
Update your file /etc/sudoers.d/remotelabz
sudo cp /opt/remotelabz/config/system/sudoers /etc/sudoers.d/remotelabz
To test the ssh key copy, you have to :
sudo -u remotelabz ssh -i /home/remotelabz/.ssh/myremotelabzfront remotelabz-worker@Worker_X-IP
Migration from 2.4.1.5 to 2.4.2.4
A new feature has been introduced which allow to define which protocol that can be used to access the device's console : vnc, serial or login. So we have to add this protocol to each device. You can have more than one procotol to the same device. For example, we can use the vnc protocol to connect to a qemu vm and the serial protocol to use telnet on the serial line of the VM where the OS is configured.
The main usage is :
- vnc for qemu VM
- login for container lxc
- serial for network device like firewalls, switchs, routers, ...
Migration from 2.4.1.1 to 2.4.1.3
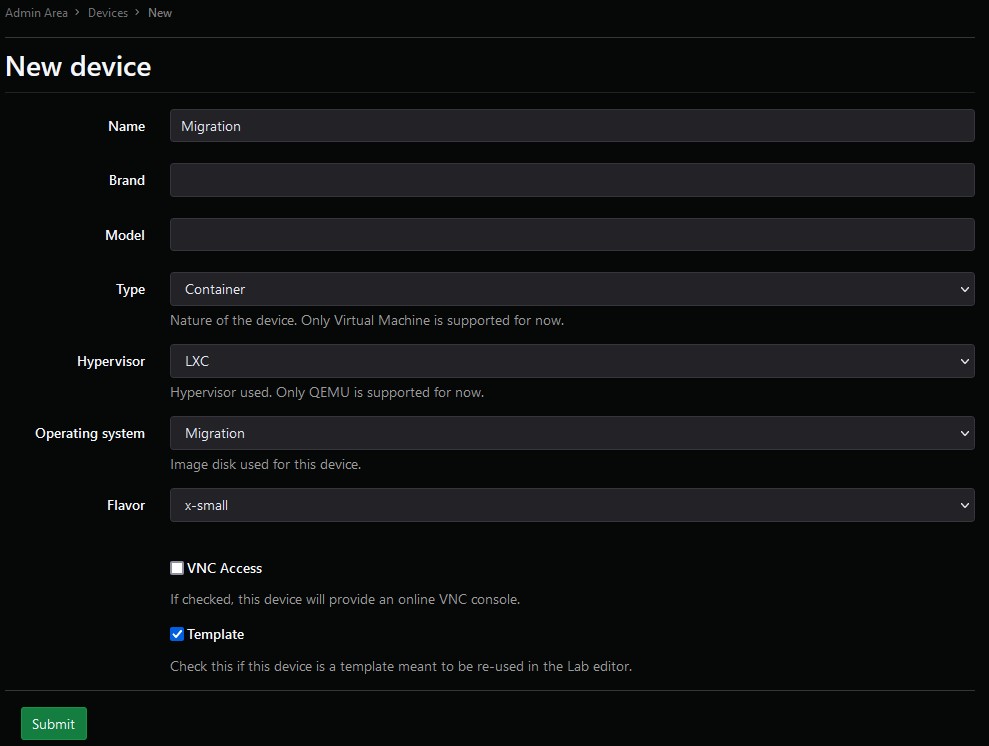
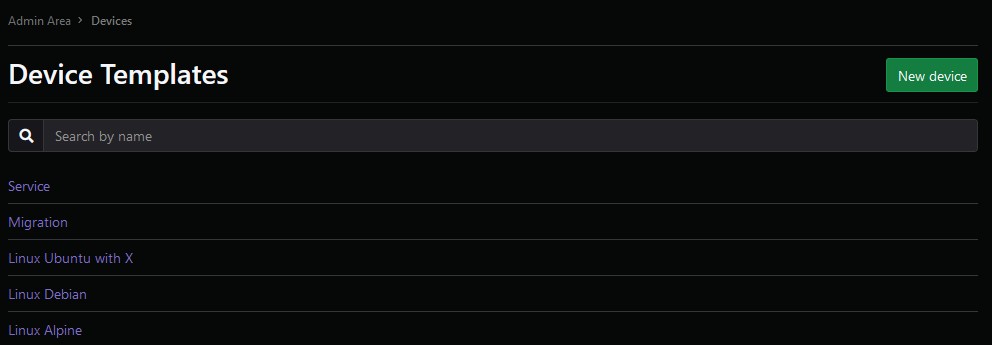
In your device, you have a device which is named "Migration". This container will be used to configure a new container, called "Service" which will provide a DHCP service to each lab you will build.
First : in the sandbox, start the "Migration" device. In the console, configure the network of the device (show the log to know it) and next, type the following command :
apt-get update; apt-get -y upgrade; apt-get install -y dnsmasq;
echo "dhcp-range=RANGE_TO_DEFINED" >> /etc/dnsmasq.conf;
echo "dhcp-option=3,GW_TO_DEFINED" >> /etc/dnsmasq.conf;
sync;
systemctl enable dnsmasq;
Cmnd_Alias REMOTELABZ_CMDS = /bin/systemctl start remotelabz*, /bin/systemctl stop remotelabz*, /bin/systemctl status remotelabz*

%www-data ALL=(ALL) NOPASSWD: REMOTELABZ_CMDS
Migration from 2.4.0 to 2.4.1.1
To update from 2.4.0 to 2.4.1.1, on the worker, you need to type the following command :
sudo lxc-create -t download -n Migration -- -d debian -r bullseye -a amd64 --keyserver hkp://keyserver.ubuntu.com
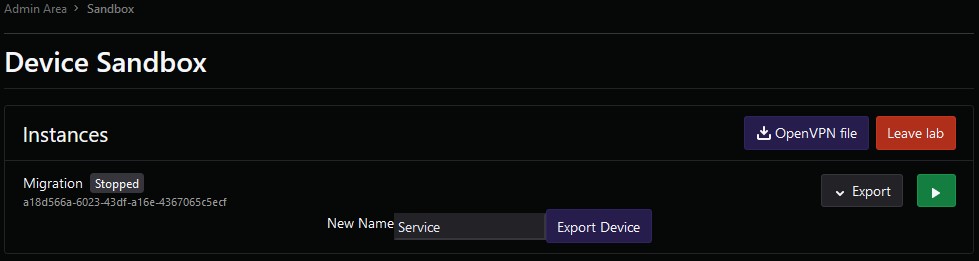
 In the Device Sandbox menu, click on the button "Modify" of the device "Migration" and start it (with button play). On the worker, a new container is created and started with an uuid name. You can find the uuid under the device name "Migration", like in the following image.
 In this example, the uuid is
a18d566a-6023-43df-a16e-4367065c5ecf.This container can be listed directly on the worker, using the command lxc-ls -f.

A DHCP server must be installed on this container. The example below is using the previous uuid.
sudo lxc-attach -n "a18d566a-6023-43df-a16e-4367065c5ecf"
echo "nameserver 1.1.1.3" > /etc/resolv.conf
apt-get update
apt-get upgrade
apt-get install dnsmasq
echo "dhcp-range=RANGE_TO_DEFINED" >> /etc/dnsmasq.conf
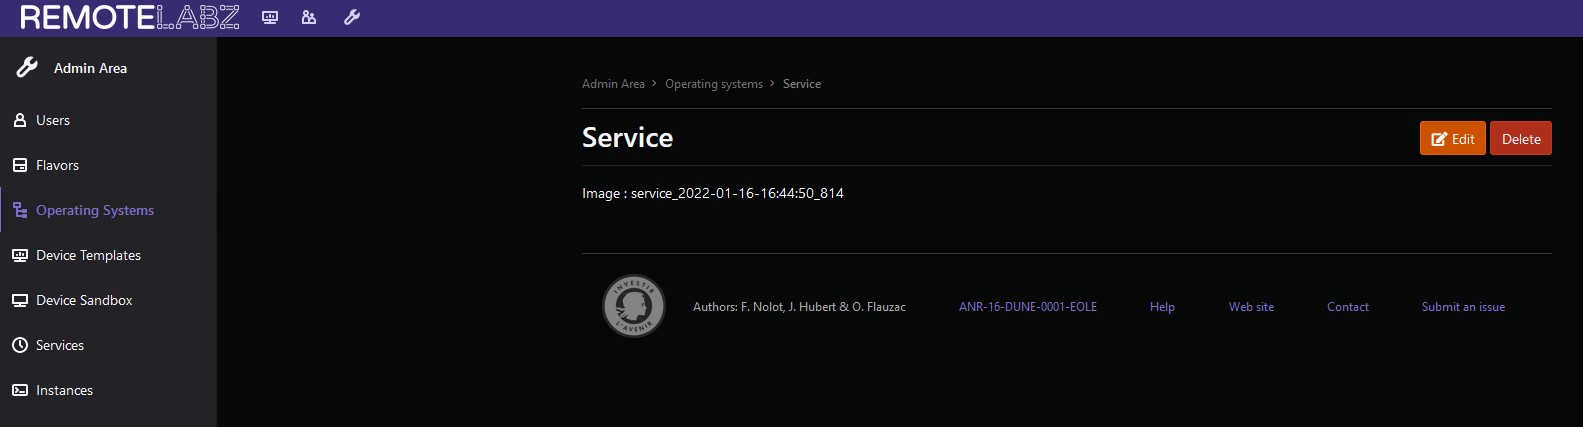
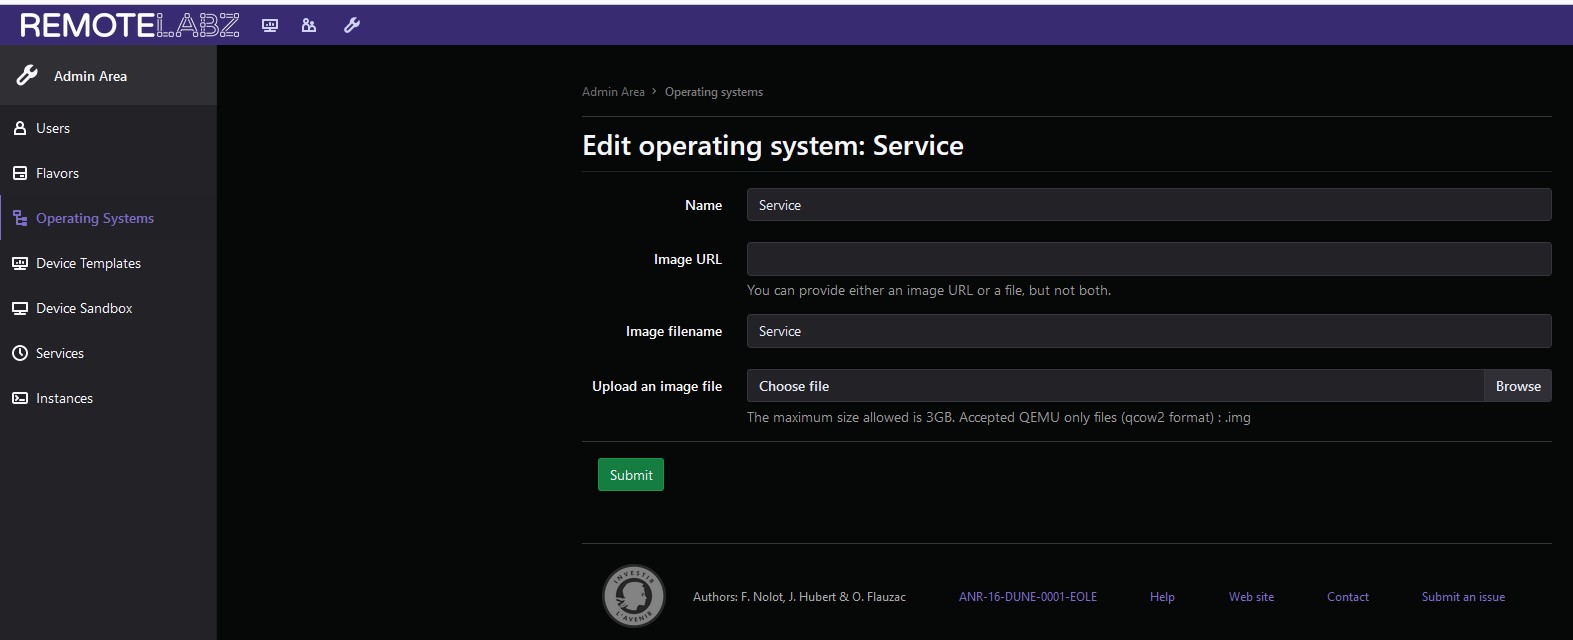
Then a new operating system and device is created with the name "Service" but the name of the operating system's image is wrong. It is called "service_" following a date.Using the Edit button, Edit this name and name it "Service" instead.
Change the image filename "service_" to "Service"
Now, once a new lab has been created using this device, all other devices on it will automatically receive IPv4 addresses thanks to the DHCP server installed in the associated container. The DHCP's IPV4 will be the (last IPv4 - 1). The last IP always corresponds to your laboratory's gateway.
Migration from 2.3 to 2.4.0
To update from 2.3 to 2.4.0, add default image to all labs with the following command :
sudo find /opt/remotelabz/public/uploads/lab/banner/* -type d -exec cp /opt/remotelabz/public/build/images/logo/nopic.jpg {}/nopic.jpg \;