RemoteLabz's installation guide
This section guides you through the installation of RemoteLabz and its components on an Ubuntu system. We assume you have already installed an Ubuntu Server 20.04 LTS.For now, we support only this version of Ubuntu.
Requirements
Only Ubuntu-based distributions are compatible with RemotelabZ.
The first step is to install a ubuntu distro like Ubuntu Server 20.04 LTS https://releases.ubuntu.com/20.04.4/ubuntu-20.04.4-live-server-amd64.iso on
- only one server or one VM if you want to use the Front and the Worker on the same server
- 2 computers if you want to separate your Front and your Worker.
Warning
This application doesn't work neither in a container, nor in WSL
To install both the Front and the Worker on the same device, the minimum requirement is
- a hard disk of at least 30 Go.
- 2 Go of RAM
- 1 CPU
This depends of the number of VMs, containers, and, operating system used, you want to run simultaneously. At the end of the installation, 4 devices will be installed and configured :
- 3 containers with Debian 11.4, Alpine Edge, Ubuntu Server 24.04 LTS
- 1 VM Alpine 3.10
The 5th device, called "Migration" is another Debian used for configuration. At the end of the installation, a 6th container with a DHCP service must be created.
Warning
RemoteLabZ require PHP 7.4 to work properly. PHP 8.0 or higher is not supported.To downgrade PHP see PHP Downgrade
Installation of the front
Retrieve the RemoteLabz Front source
A remotelabz directory will be created on your home directory.
cd ~
git clone https://github.com/remotelabz/remotelabz.git --branch master
You have now a directory remotelabz created on your home directory.
Warning
If you want to install a specific version, follow these instructions. For version 2.4.1 for example.
git clone https://github.com/remotelabz/remotelabz.git --branch 2.4.1 --single-branch
git clone https://github.com/remotelabz/remotelabz.git --branch dev
Install the requirements
cd remotelabz
sudo ./bin/install_requirement.sh
After this process, you have to take into account the following information :
RabbitMQ and MySQL pre-configurations
The MySQL is configured with the root password : "RemoteLabz-2022$", and a user "user" is created with password "Mysql-Pa33wrd$". It is recommended to change it once you have ensured that RemoteLabz is working fine.
Tips
During the install_requirement.sh process, a remotelabz-amqp user is created in RabbitMQ with the password password-amqp. If you want to change the password of an existing user remotelabz-amqp of your RabbitMQ, you have to type the following command :
sudo rabbitmqctl change_password 'remotelabz-amqp' 'new_password'
new_password
sudo mysql -u root -h localhost
ALTER USER IF EXISTS 'root'@'localhost' IDENTIFIED BY 'new_password';
FLUSH PRIVILEGES;
EXITS;
user and its password Mysql-Pa33wrd\$. If you want to change to new_password for example, you have to do the following:
ALTER USER IF EXISTS 'user'@'localhost' IDENTIFIED BY 'new_password';
FLUSH PRIVILEGES;
EXITS;
OpenVPN pre-configuration
The default passphrase used during the install_requirement.sh process is R3mot3!abz-0penVPN-CA2020. You can find this value in your .env file
SSL_CA_KEY_PASSPHRASE="R3mot3!abz-0penVPN-CA2020"
/opt/remotelabz/.env.local.
Warning
The last line push "route 10.11.0.0 255.255.0.0" in your /etc/openvpn/server/server.conf must be modified if you modify, in your .env.local file, the parameters of the two next lines
BASE_NETWORK=10.11.0.0
BASE_NETWORK_NETMASK=255.255.0.0
This network will be the network used for your laboratory. Your user must have a route on its workstation to join, via his VPN, his laboratory. Be careful, this network must be different of your home network.
`
Configure the mail (Exim4)
- Configure the /etc/aliases to redirect all mail to root to an existing user of your OS
- Check the aliases with the command
exim -brw root - Edit the file
/etc/exim4/exim4.conf.templateand locate the part "Rewrite configuration" until you have an output like the following example :###################################################################### # REWRITE CONFIGURATION # ###################################################################### begin rewrite user@* myemail@domain.com FfrsTtcb root@* myemail@domain.com FfrsTtcb - Update your exim configuration with command
sudo update-exim4.conf, following the commandsudo service exim4 restart - Check if all addresses are rewritten with the command
exim -brw root
Install RemoteLabz application
The install process will create the directory /opt/remotelabz.
While you're in RemoteLabz root directory :
cd ~/remotelabz
sudo ./bin/install
After this process, you have to take into account the following information :
RabbitMQ and MySQL pre-configurations
The MySQL is configured with the root password : "RemoteLabz-2022$", and a user "user" is created with password "Mysql-Pa33wrd$". It is recommended to change it once you have ensured that RemoteLabz is working fine.
Tips
During the install_requirement.sh process, a remotelabz-amqp user is created in RabbitMQ with the password password-amqp. If you want to change the password of an existing user remotelabz-amqp of your RabbitMQ, you have to type the following command :
sudo rabbitmqctl change_password 'remotelabz-amqp' 'new_password'
new_password
sudo mysql -u root -h localhost
ALTER USER IF EXISTS 'root'@'localhost' IDENTIFIED BY 'new_password';
FLUSH PRIVILEGES;
EXITS;
user and its password Mysql-Pa33wrd\$. If you want to change to new_password for example, you have to do the following:
ALTER USER IF EXISTS 'user'@'localhost' IDENTIFIED BY 'new_password';
FLUSH PRIVILEGES;
EXITS;
Info
During the installation, some actions is done on the directory permission :
chgrp remotelabz /etc/openvpn/server -R
chmod g+rx /etc/openvpn/server -R
OpenVPN pre-configuration
The default passphrase used during the install_requirement.sh process is R3mot3!abz-0penVPN-CA2020. You can find this value in your .env file
SSL_CA_KEY_PASSPHRASE="R3mot3!abz-0penVPN-CA2020"
/opt/remotelabz/.env.local.
Warning
The last line push "route 10.11.0.0 255.255.0.0" in your /etc/openvpn/server/server.conf must be modified if you modify, in your .env.local file, the parameters of the two next lines
BASE_NETWORK=10.11.0.0
BASE_NETWORK_NETMASK=255.255.0.0
This network will be the network used for your laboratory. Your user must have a route on its workstation to join, via his VPN, his laboratory. Be careful, this network must be different of your home network.
`
Configure the RemoteLabz database
Run the remotelabz-ctl configuration utility to setup your database :
cd /opt/remotelabz
sudo bin/remotelabz-ctl reconfigure database
Don't forget to edit your /opt/remotelabz/.env.local :
Warning
Don't forget to modify the line PUBLIC_ADDRESS="your-url-or-ip-of-your-front"
Generate API keys
At the root of your RemoteLabz directory:
cd /opt/remotelabz
sudo mkdir -p config/jwt
sudo openssl genpkey -out config/jwt/private.pem -aes256 -algorithm rsa -pkeyopt rsa_keygen_bits:4096
#Your can use as passphrase "JWTTok3n"
sudo openssl pkey -in config/jwt/private.pem -out config/jwt/public.pem -pubout
sudo chown remotelabz:www-data * -R
sudo chmod g+w /opt/remotelabz/var -R
sudo chmod g+w /opt/remotelabz/public/uploads -R
sudo chmod g+w config/templates
sudo chmod g+r config/jwt/private.pem


# Replace 'yourpassphrase' by your actual passphrase
echo "JWT_PASSPHRASE=\"JWTTok3n\"" | sudo tee -a .env.local
Warning
Avoid special character in the JWT, otherwise you will have some errors
Warning
You have to configure the variable DEPLOY_SINGLE_SERVER in your .env.local . Set to the value 1 if you deploy the RemoteLabz on only one server and set to 0 otherwise. The default value is 1 because we assume you deploy the front and the worker on the same server.
Tips
In order for the app to work correctly, a key pair is created for JWT. You can find detailed configuration in the LexikJWTAuthenticationBundle doc.
Start the RemoteLabz Front
In order to be able to control instances on the worker, you need to start Symfony Messenger :
sudo systemctl enable remotelabz
sudo systemctl enable remotelabz-proxy
sudo systemctl start remotelabz
sudo systemctl start remotelabz-proxy
You can now test your RemoteLabz front with your internet navigator but you will just make connection until the worker is not installed.
Info
The default credentials are :
- Username :
root@localhost - Password :
admin
You may change those values by using the web interface.
Warning
When consuming messages, a timestamp is used to determine which messages the messenger worker is able to consume. Therefore, each machines needs to be time-synchronized. We recommend you to use a service like ntp to keep your machines synchronized.
Warning
Now you have to install RemoteLabz Worker
Installation of the Worker
Retrieve the RemoteLabz Worker source
A remotelabz directory will be created on your home directory.
cd ~
git clone https://github.com/remotelabz/remotelabz-worker.git --branch master
remotelabz-worker directory is created after the previous command.
Tips
If you want to install only a specific version, you have to do the following instruction, for version 2.4.1 for example.
git clone https://github.com/remotelabz/remotelabz-worker.git --branch 2.4.1 --single-branch
git clone https://github.com/remotelabz/remotelabz-worker.git --branch dev
Installation of the RemoteLabz worker application
cd ~/remotelabz-worker
cp .env .env.local
You should modify the ~/remotelabz-worker/.env.local file according to your environment before starting the worker installation.
Next, type
sudo ./install
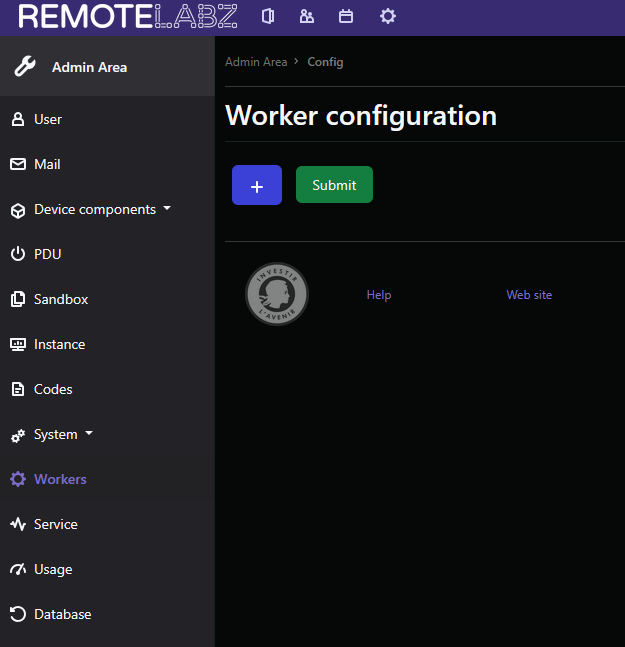
Configuration of the worker
You have to configure the worker IP on the web interface of the front by clicking on the button + and type its IP. If you use only one server for the front and the worker, you can put 127.0.0.1 .
On your worker, you have to define the message queue and its IP, in the file /opt/remotelabz-worker/config/packages/messenger.yaml. When you add a new worker to the front, you will have to add the following lines
    messages_worker1:
        binding_keys: [Worker_1_IP]
framework:
    messenger:
        transports:
            async: '%env(MESSENGER_TRANSPORT_DSN)%'
            worker:
                dsn: '%env(MESSENGER_TRANSPORT_DSN)%'
                options:
                    queues:
If you add another worker, you will have to add,
    messages_worker2:
        binding_keys: [Worker_2_IP]
Warning
Don't forget to modify your /opt/remotelabz-worker/.env.local file. You have to define the following parameters :
ADM_INTERFACE; FRONT_SERVER_IP; SSH_USER_PASSWD; SSH_USER_PRIVATEKEY_FILE; SSH_USER_PUBLICKEY_FILE
You have also to configure your
Start your RemoteLabz Worker service
Normally, the service remotelabz-worker is started during the installation phase and it will start automatically when your system boots up.However, if you need to start the service manually :
sudo systemctl start remotelabz-worker
Tips
To automatically start the service on boot
sudo systemctl enable remotelabz-worker
sudo service remotelabz-worker status
You can check the worker's log in /opt/remotelabz-worker/var/log/prod.log
Warning
When consuming messages, a timestamp is used to determine which messages the messenger worker is able to consume. Therefore, each machines needs to be time-synchronized. We recommend you to use a service like ntp to keep your machines synchronized.
The installation is finished and RemoteLabz application must be working now.In order to be fully usable, you'll have to change the parameter in the /opt/remotelabz/.env.local according to the following :
APP_MAINTENANCE=0
If you have an error 500, do the following :
cd /opt/remotelabz
sudo chown -R www-data:www-data config/jwt
sudo chown -R www-data:www-data var
Configure your RemoteLabz
Check permission on log files
On the Front :
sudo chown -R remotelabz:www-data /opt/remotelabz/var
sudo chmod ug+w -R /opt/remotelabz/var
On the Worker :
sudo chown -R remotelabz-worker:www-data /opt/remotelabz-worker/var
sudo chmod ug+w -R /opt/remotelabz-worker/var
Add a DHCP Service for your laboratory
In the device list, you will find a device with the name "Migration". This container will be used to configure, via the Sandbox function, a new container, called "Service" to provide a DHCP service to your laboratory. Each laboratory has its own DHCP service and its own network, so the RemoteLabz needs to configure this generic container to offer IP on the right network. For each lab, if you add the DHCP service container, it will be configured with the IP : IP_Gateway - 1. For example, if your attributed network is 10.10.10.0/27, your gateway will be 10.10.10.30 and you DHCP service container will have the IP 10.10.10.29 .
First : go to the sandbox menu and start the "Migration" device. Next, in the console of the started device, configure the network of the device (show the log, with "Show logs" button to know it)
Tips
Add an IP address ip addr add X.X.X.X/M dev eth0
Add the default route ip route add default via X.X.X.X
Next, type the following command :
sudo rm /etc/resolv.conf
echo "nameserver 1.1.1.1" > /etc/resolv.conf
apt-get update; apt-get -y upgrade; apt-get install -y dnsmasq;
echo "dhcp-range=RANGE_TO_DEFINED" >> /etc/dnsmasq.conf
echo "dhcp-option=3,GW_TO_DEFINED" >> /etc/dnsmasq.conf
systemctl stop systemd-resolved
systemctl disable systemd-resolved
systemctl disable systemd-networkd
systemctl enable dnsmasq
The last line (systemctl disable systemd-networkd) is mandatory otherwise your container will not have any IP.
Your "Service" device, which is a container, is now ready. You have to stop the Migration device, click on Export and type, as a New Name : Service and click on the button "Export Device" On your lab, if you add Service device, you will have a DHCP service for all your devices of your lab.
Secure the communication
If you want to secure all communication between the client, the Remotelabz front and the Remotelabz Worker, you have to follow the instruction of page SSL