Scheduled Actions
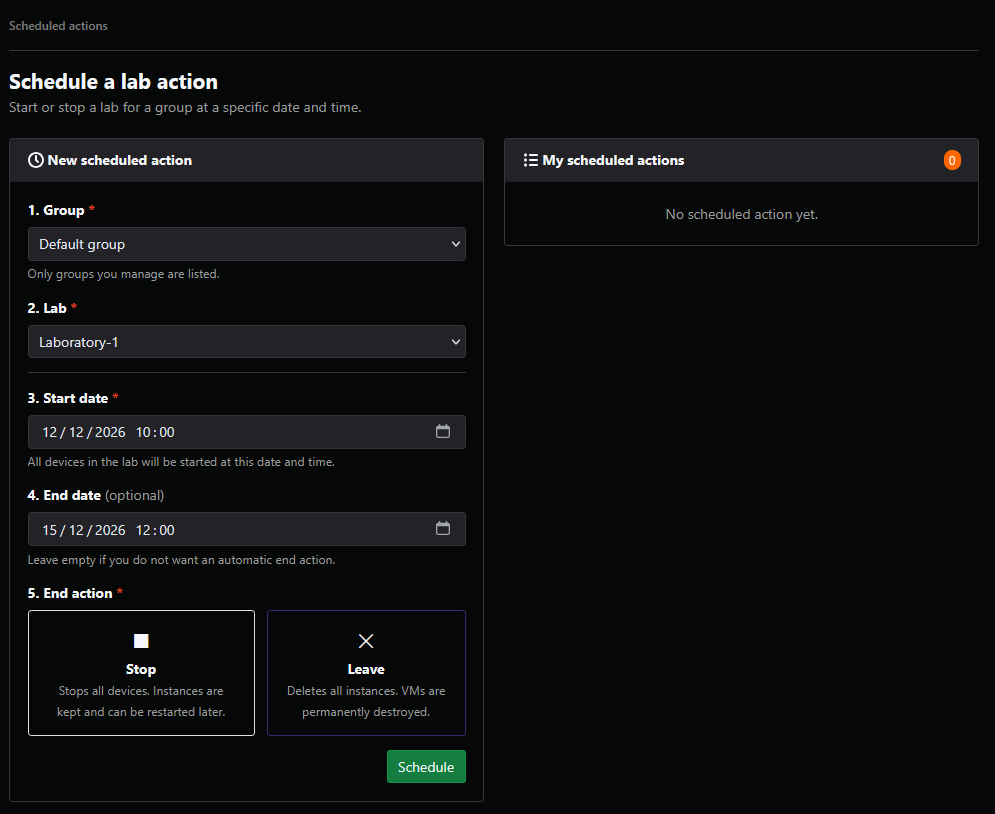
You can schedule starting and stopping a lab for a group at a specified date and time. This page is divided into two sections:
- New scheduled action — it is used to create a new scheduled action.
- My scheduled actions — it lists the actions you have already scheduled.
Create a scheduled action
To create a scheduled action, fill in the form with the following fields:
- Group: select the group for which the action will be scheduled. Only the groups you manage are listed.
- Lab: select the lab to which the action applies.
- Start date: set the date and time at which the action will start. All devices in the lab will be started at this date and time.
- End date (optional): set the date and time at which the end action will be triggered. Leave this field empty if you do not want an automatic end action.
- End action: choose what happens when the end date is reached:
- Stop — stops all devices. Instances are not destroyed and can be restarted later.
- Leave — deletes all instances. Instances are permanently destroyed.
Once all fields are filled in, click Schedule to confirm and create the scheduled action.
View scheduled actions
In the My scheduled actions panel, on the right side of the page, it displays the list of actions you have scheduled, with a counter showing how many are pending. You can delete the scheduled actions by clicking the X button.
If no action has been scheduled yet, the panel displays: "No scheduled action yet."